Tweaks for Ubuntu 17.04

April 25, 2017

I recently did a fresh installation of Ubuntu 17.04 since my root partition becoming full. I also took the opportunity to delete the swap partition. Canonical decided to use swap file from now on instead of the dedicated partition. So, here are my post installation items.

  • Icon Theme – Faenza
sudo add-apt-repository ppa:tiheum/equinox
sudo apt-get update
sudo apt install faenza-icon-theme

Faenza.png
  • Unity Tweak Tool
sudo apt install unity-tweak-tool
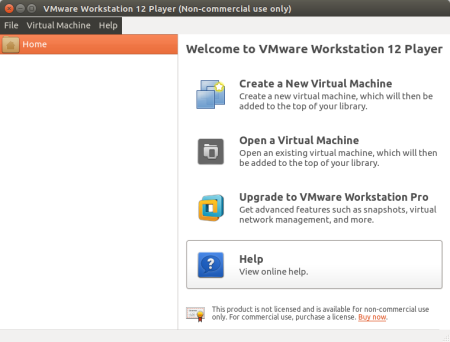
  • Vmware Player

Most of the credit goes to Ji M and his blog http://ubuntuhandbook.org/index.php/2014/10/install-vmware-player-ubuntu-14-10/

Make sure you have kernel headers.

sudo apt-get install build-essential linux-headers-$(uname -r)

Download latest Vmware Player from below link. Previously it was Vmware Player and latest version was 6. I think a year or two years ago it’s changed to Vmware Workstation Player and version became 12.

VmWare 12

Make the file executable from its properties or you can use the code below.

chmod 755 Downloads/Vmware-Player-12.5.5-5234757.x86_64.bundle

Install with following command.

gksudo bash ~/Downloads/Vmware-Player-12.5.5-5234757.x86_64.bundle

vmware

  • Restricted Extras
sudo apt-get install ubuntu-restricted-extras
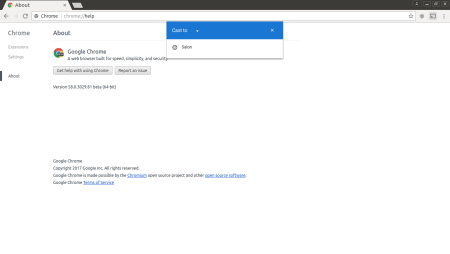
  • Chrome Beta

This is for to be able to use chromecast. Chromium is not working anymore for casting at least for me.

https://www.google.com/chrome/browser/beta.html

dpkg -i /path/to/deb/file

Chrome was downloaded to a temp directory. I encountered some dependency problems. Therefore Ubuntu Software couldn’t install it. Following recommendations from apt-get messages, I managed to install.

chrome_beta.png

 You can find the apt commands as a whole for the Ubuntu available packages.

sudo add-apt-repository ppa:tiheum/equinox
sudo apt-get update
sudo apt install faenza-icon-theme unity-tweak-tool build-essential 
linux-headers-$(uname -r) ubuntu-restricted-extras

Thanks for your reading 🙂

Firefox tweaks after a fresh install

July 3, 2011

When I do a new Firefox installation (e.g. on a new computer), following tweaks are the things that I almost do immediately. These improve my Internet browsing and productivity. These adjustments will be done in a new tab by typing about:config.

1. Search in a new tab

One of the most annoying things for me is when you do a search its results brought to the screen that you reading. I always like the search results in a new tab.

In Filter section type tab and find browser.search.openintab. Change it to true by double-clicking on it.

2. Do not switch to the new tab

Even the “switch immediately” box not checked as you can see below, Firefox switches immediately when you open a link in a new tab. To fix this, in the about:config tab find the browser.tabs.loadDivertedInBackground and make it true by double-clicking on it.

3. Open links at the end of tabs

Firefox opens new tabs to the right of the parent tab. Some may like this. However, when I have many tabs it is easy for me to switch to the new one if it is opened at the end. So find the browser. tabs. insertRelatedAfterCurrent and change it to false this time.

I feel more comfortable with these changes and thanks to Firefox’s easy to use and feature rich about:config tab.

Trying Ubuntu 11.04 with Virtualbox on 10.10

May 2, 2011

I downloaded Ubuntu 11.04 “Natty Narwhal” but I haven’t decided yet to use as my regular OS. I have some doubts about using “unity”. So the easiest way to try is installing it using Virtualbox.

My current operating system is Ubuntu 10.10 and I had Virtualbox 3.2.8 installed. I did install 11.04 but unity did not work on it even 3D acceleration was activated. I installed Virtualbox 4.0.6 by downloading from here and running default Ubuntu software package installer. Newer Virtualbox recognized my previously installed Ubuntu 11.04. I checked the box for 3D acceleration.

As I started the virtual 11.04 I did get the non-unity desktop, which I was expecting. I exited from the full screen view and I was able to see virtualbox menu. I selected “Install Guest Editions” from Device menu. Immediately I saw the CD image on the desktop.

The tricky part for me began after this point. Entering into this Virtualbox additions CD folder and running “autorun.sh” by double clicking on it did not make the unity running for me. Instead, I needed to type sudo ./VBoxLinuxAdditions.run in the terminal from the additions folder.

I restarted the virtual system and unity worked this time. Basically what I did is; installed Virtualbox 4.0.6, enabled 3d acceleration and installed Virtualbox additions correctly. I hope this works for you too.

Quickly color your prompt in Ubuntu 9.10

January 31, 2010

I found this while trying to color my bash prompt by using my old post. It was simpler than I thought. Just open your .bashrc file. Type this in a terminal:

nano .bashrc

Scroll down a little bit and you should see a line with #force_color_prompt=yes

.bashrc

Remove the # comment sign and Ctrl-X to exit and y to save the file as .bashrc. To get the new .bashrc in the terminal simply type

source .bashrc

That’s it. You got the color prompt!

NX free edition installation on Ubuntu 7.10

October 28, 2007

First, we need to have ssh server installed and running. Just type the following:

apt-get install openssh-server

Now, we need to download deb packages from here. Then install them:

sudo dpkg -i nxclient_3.0.0-84_i386.deb
sudo dpkg -i nxnode_3.0.0-88_i386.deb
sudo dpkg -i nxserver_3.0.0-74_i386.deb

After the installation we need to add a user to nxserver. I am using my regular username which I login to the system.

sudo /usr/NX/bin/nxserver --useradd $username

That’s it. You should be able login to your system by using NX client. Ensure that you have an SSL connection enabled when setting up the connection.

If you want to run SSH and freenx at a different port then you need to change the port numbers at the following files:

sudo nano /etc/ssh/sshd_config
# What ports, IPs and protocols we listen for
Port 22
# Use these options to restrict which interfaces/protocols sshd will bind to
#ListenAddress ::
#ListenAddress 0.0.0.0
Protocol 2

Change the port number and restart the ssh server:
sudo /etc/init.d/ssh restart

Edit the nxserver config file at the two locations where you see SSHDPort:

sudo nano /usr/NX/etc/server.cfg
# Specify the TCP port where the NX server SSHD daemon is running.
#
SSHDPort = "22"


# Specify the TCP port where the SSHD daemon is running on the NX SSH
# authentication server.
#
SSHDAuthPort = "22"

Edit the node config file:

sudo nano /usr/NX/etc/node.cfg
# Specify the TCP port where the NX node SSHD daemon is running.
#
SSHDPort = "22"

Restart the nxserver:
sudo /usr/NX/bin/nxserver --restart

Terrible Experience of Ubuntu 7.10 Installation

October 20, 2007

Almost a disastrous install on Toshiba M40 laptop !

I was not expecting this from Ubuntu. First problem was at partitioning. I have a windows partition located at /dev/sda1. I changed the mount point of this partition to /windows but I suggest to leave it as /media/sda1. Otherwise it stucks at creating ext3 file system for /. Then you need to run Gparted and unmount the windows partition so installer can continue. I spent many hours to find this. This might be a bug because it did not happen in Kubuntu 7.10.

Installation was OK but when I logged in I saw about 400 packages waiting to be upgraded. This surprised me because I wasn’t expecting this much upgrade for a new released distro. Update was slow because of heavy trafiic through servers but went flawless. I think waiting a week after a new release is a good idea.

The second part of the problem was screen resolution. Gutsy installs nvidia-glx-new (100.14.19) as default. If you have a 6xxx or 7xxxx series card, I suggest to use nvidia-glx driver(1.0.9639). With the new driver it can never activate it and falls back to 640×480 resolution. This is my nvidia card:

lspci -nn|grep 300
01:00.0 VGA compatible controller [0300]: nVidia Corporation NV43 [GeForce Go 6600] [10de:0148] (rev a2)

I first did the full upgrade without enabling restricted drivers. Then restarted the computer and installed nvidia-glx driver from synaptic. Then changed the “nv” driver section of my xorg.conf file to “nvidia” and CTRL+Alt+Backspace. You can do the following trick if borders of the windows are gone when you activate compiz-fusion from System –> Preferences –> Appearance:

sudo nvidia-xconfig --add-argb-glx-visuals -d 24

I added medibuntu repos for the non-free stuff like acrobat reader. The instructions are here. Basically add the repo and the gpg key:

sudo wget http://www.medibuntu.org/sources.list.d/gutsy.list -O /etc/apt/sources.list.d/medibuntu.list
wget -q http://packages.medibuntu.org/medibuntu-key.gpg -O- | sudo apt-key add - && sudo apt-get update

For Java and Acrobat Reader type the following:

sudo apt-get install sun-java6-jre sun-java6-fonts sun-java6-plugin acroread acroread-escript acroread-plugins mozilla-acroread

Now, everything works. It took me almost a day to accomplish all this. I installed Ubuntu two times and Kubuntu once to get it rightcubeswift. Good luck.

File and disk space usage report on Linux

August 26, 2007

Linux has very useful commands but usually they need some extra parameters to read the output easily. du and df are among these. du reports the file and directory usage. It is the command to find about the size of a directory and its sub-folders. Here it is how I use it:

du --block-size=1M --exclude='./.*' --max-depth=1 |sort -n

and the output,

du

--block-size gives the file size in 1 megabyte blocks, --exclude='./.*' does not select the files&folders provided by the pattern which is hidden files&folders and --max-depth=1 shows only the directories. After these options I sort the output so that it lists by ascending according to directory size. The last number 7107 is the total size of my home directory in megabytes except the hidden folders&files. You can put this command as duu into alias list by typing

echo alias duu='du --block-size=1M --exclude='./.*' --max-depth=1 |sort -n' >> ~/.bashrc

df is similar but for file systems. You can check the home and root folder usage easily:

df -h

df

-h parameter is for human readable output. It provides the total usage in mega or gigabytes. Otherwise numbers are in bytes which is hard to read.

Presentations with Latex (PROSPER Class)

August 13, 2007

On Kubuntu 7.04 I did the following steps to install prosper class for Latex:

Download seminar and prosper to your home directory,

wget http://tug.ctan.org/macros/latex/contrib/seminar.zip

download prosper-1.00.4.tar.gz and contrib-prosper-1.0.0.tar.gz from http://prosper.sourceforge.net/.

Installation:

sudo apt-get install kile
sudo mkdir -p /usr/local/share/texmf/tex/latex/
cd /usr/local/share/texmf/tex/latex/
sudo unzip ~/seminar.zip
sudo tar -zxvf ~/prosper-1.00.4.tar.gz
sudo tar -C prosper/ -zxvf ~/contrib-prosper-1.0.0.tar.gz
sudo texhash

It’s ready to use. You may want to take a look at http://amath.colorado.edu/documentation/LaTeX/prosper/ for usage. Kile is an excellent GUI&editor for Latex.

Install Ubuntu without Partitioning

July 17, 2007

After my friend’s attempt failed to have an open source software development environment (Cygwin) setup on Windows, I suggested to him to install Kubuntu. I said Kubuntu because I gave up on Suse after failing on the X server as a result of new Nvidia driver update with YAST. Anyway, my friend liked the Kubuntu 7.04 live CD and wanted to install but installer gave an error at resizing the windows partition. He has an IBM Thinkpad provided by the university (which he is doing his PhD) with 512 MB Ram and Pentium M processor. Even though he defragmented the hard drive, there were couple of things showing as unmovable files at the windows defragmenter. We tried Gparted live CD and no luck. We tried Partition Magic and nothing worked. Then I suggested to use Wubi. It’s a linux installer on windows. You just need to download the installer and after running it enter couple of essential things like your username, password, language and Ubuntu flavor. You can install Ubuntu, Kubuntu, Xubuntu, Edubuntu and Ubuntu Studio. It downloads the ISO file and starts to install by creating an image file on your hard disk without partitioning. You can select OS at the boot. It worked very well.

Easy Configuration for VMware Player

July 2, 2007

It is fun to try out multiple Linux distributions on a single OS without partitioning your hard drive. If you don’t want to install VMware server, player version is an excellent tool for either virtual LiveCD or installation purposes. You can see various distributions installers and improve your Linux installation skills.

First, you need VMware Player. You can download it from http://www.vmware.com/download/player. I have version 1.0.3 installed on my Windows XP box but you can try the newest one. You need to fill out couple of things to be able to download it. Other than that it is free. After you ran the VMware Player, it will ask you to select a vmx file. If you are clueless about how to make one, this post will show you how to get one.

http://www.easyvmx.com/ is your friend to get configuration files for VMware Player. Click on Super Simple Virtual Machine Creator. You can fill the tables as shown below with your information.

vmware1

Hit Create Virtual Machine button and save the zip file on to your computer. Extract the package. You will see couple of vmdk and one vmx file. vmdk is your virtual hard drive and vmx is your configuration file. When you double-click on vmx file it will open up the VMware Player and start loading whichever file you specified at LiveCD (ISO) section above picture. Below is showing Fedora 7 boot selection:

fedora_vm

You can start installing or playing your virtual Linux system. You will see your virtual hard disk during installation. After the installation we need to make a small change on the configuration file so that we can boot into newly installed virtual OS. Otherwise, VMware player will boot into .iso file. Open up your .vmz file with wordpad and scroll down:

# LiveCD
ide1:1.present = "TRUE"
ide1:1.fileName = "G:\Fedora7\F-7-i386-DVD.iso"
ide1:1.deviceType = "cdrom-image"
ide1:1.startConnected = "TRUE"
ide1:1.mode = "persistent"

Change the TRUE value of startConnected to FALSE. By doing this, we turned of booting into  the .iso file.  You  can  make different configuration files using EasyVMX  and try  different tastes of Linux without  partitioning your hard  drive.